Search This Blog

Sunday, March 17, 2013

Night time in Malibu...

This past week I made it a point to capture some various photos of Malibu at night. Here's what I captured this week. Beginning with an image of the fog rolling over the Santa Monica mountains tonight...


This Oak tree sits in Malibu Creek State Park. The light behind it is the light of a cell phone used to capture the details of the tree and to create some depth. 

This is the same oak tree, but without an additional light behind the tree.

Zuma Beach at night.

Monday, March 11, 2013

The view over Malibu...star trails.

This evening I took a test photograph of the night sky over Malibu. I shoot 105 frames at 30 seconds a piece and stacked the images to get the star trails effect. This is a fun hobby of mine aside from the business aspect of photography. I love star trails and the milky way and hope to compile a collect of various images of the night sky in the future....-cg

Monday, February 25, 2013

A small trip to Yosemite....

I had an opportunity to photograph some of the Valley at Yosemite over the past weekend. Here are some previews...:-) -cg


Friday, February 15, 2013

El Matador...with the fixed 20mm.

So my quest to get the best El Matador photo continues. Tonight I came armed with a new lens I just purchased for Landscapes. The fixed Canon 20mm 2.8.

I'm going to shoot with this lens for a while to see if I like it. My first visit to El Matador yielded the following results....more to come.


This image was taken about 35 minutes after the sun went down. It's a 30 sec. exposure at F8.


Friday, January 18, 2013

The Camera Phone...master it! Part 1

As a photographer, I'm delighted to see that everywhere I go, and I mean everywhere, I see people using their mobile phones as a camera. To photograph everything.

Mainly because photography, thanks to the advances in camera sensors, mobile devices, and social media apps, has been integrated into our everyday lives. Photography is now a way to do everything from note taking to price inquiring (think about it).  So it only makes sense that all of us learn how to use camera phones to their maximum capability.

It's about control:
For those who've read past posts, you most undoubtedly know that I'm a big advocate of using a camera in M (manual) mode because it gives you full control of the technical aspects of your photograph. The more control you have as a photographer, to not only incorporate your style, technique, and photographic knowledge into the image, but to also control the composition of the elements within the frame, the more likely you are to have a great final product.

Here is a list of some of the main aspects (in no particular order )you can control in a D-SLR. Yes, some of these are obvious but must be listed.

  • Shutter Speed
  • ISO
  • Aperture
  • White Balance
  • Tones
  • Frame and Composition
  • Lens Selection

In general, the reason a D-SLR is so advantageous in photographic terms is because you have full control. This can't really be sad for a camera phone. I realize the quality of the image coming from a D-SLR versus that of a camera phone is not comparing apples to apples, but there are things you can do that can leave you quite surprised with the capabilities of camera phones.

So look at the list above and ask yourself which aspects you can control in a camera phone. Those aspects you can control, theoretically, if you perfect them, will make you one awesome camera phone user.

Now looking at the list, you can see that for the most part, if you've used a camera phone recently, you will have noticed that most camera phones are made for ease of use and quick spur of the moment photography. This means most camera phones default to Automatic settings. Something I'm not fond of in D-SLRs.

But these are phones remember? So I don't have a problem with Auto setting in a phone. So look at the list once again and examine which element you can control. That element; Composition. 

Yes, regardless of what setting the camera is choosing, you, the photographer, have full control of the composition. This brings me to the biggest tip for becoming a Camera Phone Warrior.

Perfect the art of composition.
To become a really good camera phone photographer you have to understand the art of composition. Composition is the biggest element of photography you can directly control using your camera phone. Just like using a DSLR, using a camera phone falls under the basic composition guidelines of photography.

The number one tip in composition is also the most basic one.

Use the Rule of Thirds:
The Rule of Thirds is simple. It advocates that the subject or any major part of the image should NOT be placed in the center of the photograph. Instead, it should be placed in one of the areas dividing the photograph into thirds. Using your camera phone you are able to place your main subject in areas other than the middle. This alone will make you so much better literally overnight. 
The red dots are the ideal locations for subject placement.

There are challenges with the rule of thirds and a camera phone. That challenge is mostly presented in the form of the focus point. Normally a camera phone will select what it thinks is the best focus point. I find that most camera phone tend to want to focus on the objects in the middle. This is obviously a problem if you don't want to place your subject in the center of the frame. The simple solution is to learn how to focus selectively with your phone.

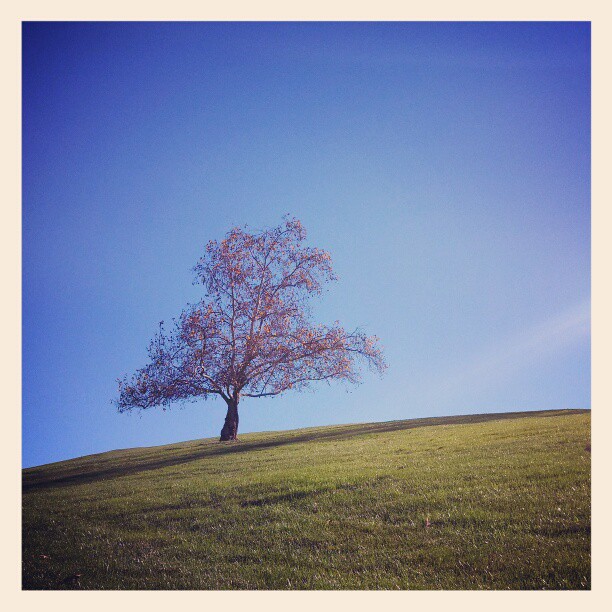
Below are a couple examples of camera phone images I took recently where I applied the Rule of Thirds to ultimately make an image more appealing. Both images where taken using Instagram and a Droid Razer HD.


The focus challenge:
On my phone (Droid Razer HD) I can actually touch the location I want to focus on. I'm not sure if the Iphone allows this but I can't imagine it not being able to. It takes practice to get it just right, but just like everything in photography, you have to practice. My tip here is to figure out how to focus and recompose an image while the focus is locked. On Droids, I know you can focus on the subject in the middle and lock the focus on that middle spot while you recompose. Again, there are so many phones all will have something a little different about them, so just play with it until you figure out how to focus it.

I will continue with my next part of mastering your Camera phone in the future...there's lots to cover on this little camera topic (no pun intended). -cg


Wednesday, January 9, 2013

Picking the Right Camera: Part 2..Make a list

In my first post about picking the right camera I focused primarily on Megapixels. Yes, Megapixels are important, but to the regular observer, there really isn't much difference between megapixels at 18, 11, or 21 unless you are printing large scale images. Ultimately, it shouldn't be a deciding factor for picking a camera.

Make a List:
As a photographer, you will learn to stack rank what is most important to you based on what you will primarily be photographing. So my second tip for picking a camera is to stack rank what is most important to you. Below is what my ranking looks like. I then take this ranking and find the camera that best meets those needs (Of course, if budget is an issue, it has to be considered).

#1
Noise
For me, noise and low light ability are probably on the top on my list. As a wedding photographer, I have this very high on the list because I'm shooting in challenging lighting situations constantly. That's why I use a full frame sensor such as the one found on the Canon 5D Mark iii.

Basically, when it comes to noise, the larger the sensor, the better the camera will perform under low light. This is why a point and shoot 18 megapixel camera will look very inferior to a DSLR, and especially a full frame DSLR camera. The sensors are so much larger in DSLRs and the result is that noise levels are considerably lower.

The same holds true if you buy a DSLR APS-C sized camera (although I have a couple Canon 7D's and have found them to perform very very well under low light). Still, there are major improvements being made in non-full frame cameras when it comes to noise.

Noise is a major factor for me when I pick a camera. If you shoot in low light or tend to have a lot of black tones in your photography, noise is a major factor. 


#2
Focus
This is a big one for me. As a wedding photographer and portrait photographer, focus ability is very high on the list. Part of creating professional portraits is the ability to create a focus point on the specific part of the image that you as an artist dictate.

If the focus is slow, or if the focus is not in the spot chosen it can break an otherwise good image. So a camera's focus performance is very important to me. Especially when it means capturing a moment a wedding that you may have otherwise missed if your camera didn't focus fast enough. This is one of the areas where a so called "professional" camera exceeds the performance of the entry level DSLRs.

Now both advanced and entry level DSLR's are capable of taking gallery worthy images of a subject, but the advanced DSLR can give the photographer more control' which is exactly what I want. I like to maintain full control of my camera.

Just for comparison  my Canon 5D Mark iii has 61 pin point focus points that I can pick manually. The Canon 7D, not an entry camera by any means, has 19. So when it comes to focus, the 5D Mark iii outshines the 7D even though both cameras are capable of creating images that are otherwise indistinguishable to the naked eye.

#3
Dynamic Range


Dynamic range in this image insures all the details in the brightest and darkest areas of the photo are visible. A good exposure. 

Dynamic range is very important to me because of my type of style of photography. I do not ever shoot HDR (High Dynamic Range) photography because I don't think it's very natural. I don't like it. I've been accused many times of shooting HDR, because of the appearance of many of my photos. But I can attest  not a single image in my gallery is HDR. This is because I place a very big emphasis on a camera's natural dynamic range and an even greater emphasis on my ability to create a true exposure that includes a balance of the darkest and lightest points in a frame.

To do this, I have to have a camera that can expose the darkest and lightest parts of an image closest to the exposure setting I've created. If you read websites like DPreview.com they break down nearly every camera according to dynamic range. This is a serious element for me.

It's a performance issue ultimately. Whether I'm shooting portraits, nature, or weddings, the dynamic range of a particular camera can be one of the things that a professional photographer can actually see when comparing two cameras.

#4
FPS (Frames per second) and General Performance/Build.

Frames per second were never really a big issue for me. I'm not one to shoot hundreds of shots to get that perfect one. If I were a sports photographer, this would be the highest thing on the list, but for everything else, I find my needs are suited with what I have.

There are some performance and build elements that I do take into consideration. As I've mentioned before, I travel a lot and spend time in the field often. I need a camera that can take a beating. I've shot in the rain, the snow, and in the sand, so I need a camera that can literally take a beating. This is why I go with weather sealed and titanium alloy bodies. Of course, these cameras are much more expensive but for me it's worth it. Most of the entry level cameras on the market today are made of plastic. Durable, but not as stable as the titanium alloy cameras like the 5D and 7D. If I were just starting photography, I don't believe I would start out with either of those cameras though. The imaging abilities of the entry level cameras are unnoticeable to most people's eyes, so a lower priced entry camera would suit me better if I were starting photography today.

Other performance elements I particularly look for when picking a camera have more to do with advanced photography functions and custom functions. Things like memory and style settings, a locking functions dial (which the 7D lacks and drives me nutts), and LCD screen size are all things I consider.


So I basically say this:

Make your list, read reviews, test out a camera and just start shooting. Budget of course is always important. If you have $1500 to purchase a camera, I always say buy a camera in the $700-$1000 range and with the remaining money, get a lens that can perform and be of better quality than the general lenses. Glass is a whole other discuss I will save for a future blog post, but it's vital. A camera is only as good as the glass you put on it...remember. -cg

Sunday, January 6, 2013

Back to El Matador...finding the moment.

So how do you find that perfect moment? Is it the sunset, the colors, or the perfect composition of nature that makes a perfect moment? I really don't think it's anything that can be quantified. As an artist the perfect moment is just something that happens when you apply the concepts of photography. Composition, exposure, and execution will always lead to a perfect moment in my opinion. They are tools for the means.

This is what I say. Just set a goal. One thing I always remember to do when I go out with my camera in hand is make it a point to capture something I can remember. Something memorable. I find that when I set a goal to get at least one quality image where ever I am, I find it easier to get it. Something I've learned to do when I go out with my camera is to make it a mission every time.

I've been out on locations only to have light and wind and colors not work in my favor. But I've learned to use these conditions to make me more creative. This is how I learned how to use long exposures to be creative for example.

So this evening, I continued my pursuit of getting that perfect El Matador Beach photo. Like I said recently, this is a beach that is hard to photograph because it's been photographed so many times before. This evening alone I counted at least five other photographers looking for that perfect shot. But remember...I made it a goal to get something I can remember.

But what makes a memorable shot? Really, a place like that has no such thing. This is something I realized tonight. Just follow what I've learned and everything else will always fall in place right?

I noticed that each and every photographer I observed tonight was using a different camera, technique and location. I did notice that I was the only photographer that stayed once the sun actually set. I also noticed that no other photographers actually moved very much. This always baffles me. Moving locations and taking photographs in the 20 minutes after the sun is gone usually yields the most artistic photographs....but maybe that's just me.

Regardless, I'm not sure I got the perfect shot tonight, but I always have fun in the process and I believe that applying the things I've learned, including moving around and shooting after the sun is gone, led to a memorable shot. Remember, my goal was not a perfect shot...but a shot I could remember...-cg


Here's what came out.


Saturday, January 5, 2013

Picking the Right Camera..

This is the first part of a series of blog entries that will cover topics that I hope will help you decide what camera is right for you.

I've always believed that regardless of what camera is in my hands, I'm capable of taking a photograph that is worthy of any gallery. Maybe it's confidence or maybe it's experience, but whatever it is, I truly think that excellent photography is not so much the result of the equipment as it is the artist. So with that concept in mind, I think it's important to discuss a few key points that will help you decide which camera is right for you.

The one simple rule I always say when shopping for a camera; As long as your camera has M (manual) mode, you will be able to take amazing photographs regardless of how much it costs.

This is why I believe there is no such thing as a "professional" camera. Yes, there are "professional" features in cameras for the advanced photographer, but simply buying a "professional camera" never adds up to becoming a great photographer over night.

Quite honestly, many of my favorite photographs taken throughout the years were not taken with a "professional camera". Now I currently shoot with the Canon 5D Mark iii, a camera regarded as one of those "professional" cameras, but honestly, I know a Canon Rebel series can produce just as good an image.

Below are some images I've taken through the year with various levels of cameras. The concert photo is my favorite concert image. It was actually taken with a point and shoot Canon PowerShot S70.

I always display this image as a favorite. It was actually taken with a Canon 20D.
This was actually taken with a Canon Point and Shoot Powershot S70. I set it to manual mode in order to take this image. You have to be able to shoot Manual mode to get the most out of your camera. 

This is a recent image taken with a Canon 7D. 


The difference for me are the advanced features and the weather sealed body of the more expensive cameras. Shooting countless weddings and various photo shoots can take a toll on camera, so the durablity factor is important.

But before I go into the actual key elements of what camera is best for you, I'd like to remind you of another important factor that should be on your mind when deciding the right DSLR; Lenses. The selection of glass you put on the camera goes hand in hand with the quality (more on that later).

Digital SLR cameras these days, regardless of price, are amazing pieces of technology. The sensors in all cameras are so advanced that the lenses you decide to put on the cameras are just as important as the camera itself. Because these sensors capture such detail, the glass factor is important.

With that said, let's examine the first of 3 key elements of what makes a wise Digital Camera purchase....

It's not about Megapixels...

In the early days of Digital Photography, camera companies were in a battle of megapixels. What are megapixels? Basically, it's the number that tells you how many pixels the camera uses to produce an image. Most photographers, amatuer and professionals, where caught up in this battle. I for one, experienced first hand the early digital battle.

Working for a large studio, in 2003 I was able to use the Kodak 14N digital camera. The studio bought the camera based on the unprededented 14 megapixels capablity, which was over two times the standard DSLR capabilities of either Canon or Nikon at the time (the camera itself was built on a Nikon N90 body).

What the studio didn't realize is that the camera was all Megapixels and that's about it. You couldn't shoot sports or action with it because of limited capabilities and extreme noise outside. Lighting had to be precise or the noise levels were too high. At a price of $5000  per camera (the studio purchased over 20), this was an expensive lesson learned.

My advice at the time was to purchase the Canon 10D. A six megapixel camera with more verstile capabilites and a fraction of the price. Afterall, I had one of my own and was pleased. Yes, it was a 6 Megapixel camera (still very high for the times) but I knew the megapixel capabilites were just a small element of the overall picture (no pun intended).

The images below I took in 2004. One was with the 14 Megapixel Kodak 14N and one was with the 6 Megapixel Canon 10D. Can you guess which one was taken with which?


Add caption

The interesting thing about each photo is that only one of those cameras could actually take the photo of the my cat observing the candle. And it wasn't the 14 Megapixel camera.

Lesson: Never ever look for a camera based on megapixels alone.

Now, I know the examples above don't necessarily apply to today's cameras because all cameras now have made grand improvements in noise and high ISO capabilities but I use it as a lesson I learned first hand. The concept still holds true in most regards. I firmly believe it's not about Megapixels.

A higher megapixel count of zoom range does not make a camera better. Resolution is a term that is interchangeable with megapixels. In today's world, just about every camera, and all DSLR's, have more than enough for any need (unless you need a photo for a billboard). This is why it's not important. There's very little difference between 18 megapixels and 21 Megapixels, except price.

So when you are considering buying a camera, resist the temptation from a sales person trying to sell you the camera with the most megapixels. I advise, save the money and invest in better lenses.

Before I purchase any equipment I always read reviews and image comparisons online. Websites like www.dpreview.com are vital in my decision making process. The site helps break down every single camera on the market into various categories that are important to me. Things like noise, frames per second, custom functions, or focus points are other elements of a camera that are vital in the decision making process. As you become a photographer you will learn to place many of those elements in the order of your preference. For example, if you primarily plan to photograph your son or daughter in sports, then perhaps the determining factor could be Frames Per Second (FPS). If low light photograph is your interest, than a camera with the biggest sensor will perform best.

There are some differences when it comes to sensor size. Normally, entry level DSLR's will use smaller sensors than those used in higher priced cameras. In my next entry, I will continue my discussion on making a smart purchase.

For now, I will leave you with a list of entry level cameras (DSLRs) I would recommend. Each camera listed below can create images worthy of any gallery. Please remember, I'm a Canon guy (as I explained in the past). I will list the next segment in my next entry...-cg

Entry-Level
$500-$1000
    
Canon EOS Rebel 4Ti

Canon EOS 600D


Sunday, December 30, 2012

La Piedra State Beach

There are so many pretty beaches in Malibu; El Matador, Zuma, Westward, Carbon, and so on. But hidden among all those beaches is one of my favorites. It's right next to El Matador, so often, people skip it because El Matador is known so well.

I like to go there because there are so many rocks and so much wildlife. This evening alone I saw six whales just past the breaks....here's a few shots from the evening.


Thursday, December 27, 2012

Top 10 Images of the Year: 5-1

Yesterday, I shared my 10-6 favorite images of 2012. So today, I'm sharing the Top 5 favorite images I took this year.

One thing you will probably notice; Africa.

Yes, the highlight of my year was the trip to Africa. I honestly tried to find more images that weren't taken in Africa to place in my Top 10 but favorites are favorites, so here they are.....


#5
The Kiss at Point Dume


Not all my favorite images were taken in Africa. One of them was taken right in Malibu. My number 10 favorite image was a photo of Point Dume itself. But what better way to make it the ultimate Malibu wedding photograph than to capture Point Dume with the Bride and Groom.

#4
The Lone Tree


Somewhere along the Masai Mara I came across this lone tree. Now I'd seen this tree before in the months leading up to trip to Masai Mara. I was certain of it. It was the same tree filmed in Disney's African Cats. On this cloudy and stormy day in May, it was just a perfect setting. Sitting there all alone near the bumpy dirt road. Just absolutely peaceful. It's one of my favorite images. Not really sure why, but it made my list.


#3
The Elusive Leopard


If there is one thing that requires a bit of luck when in Africa, it's spotting the elusive leopard. In fact, I met a local in Kenya who has lived there 40 years and never seen a leopard. Yes, they are elusive. But not on this day. This leopard was relaxing in a tree. You could see his tail hanging like a rope from a distance. Not only did the leopard just relax there while I photographed it, it also gave me a stare that I will never forget. Almost like he was looking me straight in the eyes. A true highlight of my year and worthy of being one of my favorite images of the year.

#2 TIE
Love the kitties...and the elephants too!


Okay...so I'm cheating a bit here. There are two photos and I just couldn't decide my favorite of the two. So it's a tie. The first one is one of those images that just begs to be on the cover of a science book. It's almost a perfect capture of a Cheetah in the wild. This particular cat spent the evening teaching it's cub how to hunt. It was truly one of the highlights of the trip. To see this animal care for its young, teach it how to survive, and walk gracefully past you was just a dream come true. 

The second photo is of an Elephant and her baby at Samburu Reserve in Kenya. This is one of those images with much detail within it. Even the blades of grass are curled up like elephant's trunks.  I recently enlarged it and printed it as a gift for someone and the details in the image just makes it more impactful. It's full of love and affection. Something that encompasses these magestic animals. The Elephants were truly amazing.

Both shots were taken with the awesome Canon EF 100-400mm f/4.5-5.6L IS USM. 


#1
Natural harmony...


If there's ever been a memorable moment in my life it was this one. What can I say? Sometimes nature gives us the perfect moment. This group of giraffes was about a half mile from where I was hiking at the edge of Lake Naivasha. It was just after sunrise on a dewy morning when I noticed the giraffes in the distance. I didn't think much at the time, all my attention was on the hippos that were in the water just to the right of the frame (Lake Naivasha is known for being home to Hippos).

But curiosity got the best of this family. They wanted to see what all the commotion was about. So they walked right up to me. It was magical. Led by their father and their mother, they gracefully just walked up right beside me to drink water at the lake's edge. It was at this moment when everything came together.

It became my favorite photo I've taken in years. The composition, the colors, exposure, and the essence of the experience was captured in this single frame. Often, I tell people that in a photo, if you can capture movement in nature, it can lead to a powerful image. This image did just that.

As humans, our eyes naturally gravitate from left to right (just like we read). So psychologically, anything with that movement is normally most appealing to our minds. In this image, not only are the giraffes moving left to right but the whole frame is, in a stroke of pure luck, mimicking that motion.

Notice how the clouds follow the flow, almost like they are shadowing each and every giraffe. The pyramid effect almost looks fake. Even the plants and land are flowing left to right; But not everything can flow that direction. Something has to balance it or our minds literally get bored or confused.

Look closely and you will see one thing flowing right to left. The shadow.
It's falling from right to left and has balanced the photo to perfection. Without getting too psychological with it, it creates the balance our mind needs to make the image most appealing to our eyes.

So that's it. More travel in 2013 is planned. Perhaps back to Africa, maybe Iceland, or maybe Alaska...where ever I go, one thing is for sure. I'm going to have that Canon 5D iii and 7D at my side. :-)
-cg


Wednesday, December 26, 2012

Top 10 Images of the Year: 10-6

Someone asked me recently, "What's your favorite photo you've taken this year?". I thought to myself, "Wow, that's a good question". I've never really given that much thought. My 'photo of the year' is what I would call it right?

This past year has been a unique year for me. I've shot my fair share of weddings, portraits, and even headshots (There are actually many wedding/portraits I've taken for clients that are among my favorites but for privacy reasons I can't share). But my favorite type of photography has always been landscape and nature photography.

Sure I love weddings and portraits and emotions you can capture within them, that's what pays the bills; but landscape and nature is what's most fullfilling (artistically speaking). Perhaps it's my love for the earth and nature. Or maybe it's just because I love life and the beauty nature gives us. Regardless, when I look back. Most of my favorite photos of the year were taken in nature. In the bare elements of what Earth provides us.

I went to Kenya, Africa in 2012. So naturally, many of my favorite moments where captured there. But not all...:-)

So here's my Top 10 Images of the year and a little bit about them.

#10
Point Dume at Sunset.


I took this image with a -4 Graduated ND Filter in April 2012 using a Canon 7D. I've always loved photographing Point Dume, but like El Matador, it's been photographed so many times, by so many photographers, that it's hard to capture an image you haven't seen before. I've returned many times to capture Point Dume in my open unique way. I think I captured it in April 2012 it it's full glory. This 15 second exposure, with the last rays of light on the rock, the pink skies, perfect waves, and the converging leading lines, are the essence of Point Dume.

#9
Alda & Mommy


What can you say? Alda and Beinta are just perfect photo subjects. There was so much joy in Mommy and Daughter that capturing moments with them is almost too natural. But this portrait in particular made my Top 10 because it's full of love. We grabbed a chair, sat it in their yard, and this was the first image captured. It was all we needed to capture their grace, elegance, beauty and love. Taken with a Canon 5D Mark iii and 70-200mm 2.8.

#8
Lines at the Pier


I've always loved leading lines. In fine art, it's a powerful element of composition. One of my goals in the past year was to pursue photography from a fine art state of mind. To find images that aren't solely landscapes or nature in style; something that can serve as an art piece for any room. I captured this image underneath the Malibu Pier. Often times, you get caught up in the whole picture and neglect the small things. I see photographers at the pier photographing the whole scene, but nearly always missing the art that exists in the small details. This is a 1.5 second exposure with a -3 ND filter. It helped me capture the motion in the water, and the hard lines in the pier. Taken with Canon 5D Mark iii and 70-200mm 2.8.

#7
Amazing Grace


I'm not a morning person, but on this particular morning in January, I happened to look outside to one of the prettiest sunrises I'd ever seen. I had my camera on a tripod already from shoot the night before so it was easy. I put some slippers on and rushed down to the beach just as the sun slid over Los Angeles.


# 6
The King


This was the closest I'd ever been to a Lion. This guy was only 15 feet from me near a bush in the Masai Mara, Kenya. Having searched for a lion for a whole day without so much seeing one big cat, this guy sneaked up on us at the least expected time. The safari vehicle had just been stuck in the mud and minutes after I helped push the vehicle out, this lion appeared. Perhaps he was curious. Perhaps he was hungry. Either way, good thing I was safely in the vehicle when he showed up. I snapped hundreds of photos of him while he roamed around the vehicle. Little did I know, his lioness, was laying in the bush nearby.


Tomorrow I will count down my Top 5...-cg


Sunday, December 23, 2012

Evening at El Matador

So I've been neglecting the blog for a while but hopefully with the coming year I can stay more active on here. The reality is that between shooting, editing, and booking, it's tough to keep the blog up to date. Maybe this will be a good new years resolution...keep the blog updated! :-)

El Matador:
This evening I took a stroll to El Matador Beach. I happened to be driving by and noticed the clouds and sun behind the clouds might lead to one of those awesome colorful Malibu sunsets. It's been raining for days (what feels like weeks) in LA recently, so it's been tough to go out a photograph anything for that matter. But this evening was very calm. No wind, and I was really hoping for a rainbow. I didn't get the rainbow, nor did I get those awesome colors, but I did get a few shots that got my creative juices flowing again.

But there was a slight problem. I didn't have my lens of choice with me. I had the camera, Canon 5D Mark iii, but not my favorite landscape lens; the 16-35mm. In my bag, I always have a few filters. And in the bag tonight I only had my -4 ND filter. But it wasn't the right ring size for the 24-105 lens I had on the camera. So I still used the filter, but had to handhold it in front of the lens when I shot.

El Matador Beach is an iconic beach. It's frequented by so many photographers and there are so many photos of it, that I really am not that attracted to shooting there anymore. It's also one of those places that I never ever leave feeling I've captured a really good photograph. In the coming weeks I'm going to be coming back to El Matador until I get a shot worthy of feeling good about. I will of course share those images regardless of quality.

Here's a few images from today. All using 200ISO and long exposure times. -cg


Saturday, October 27, 2012

Light Painting After a Photo Session...

Normally, when the sun goes down and all the golden light is gone I shut down the camera and end a photo session. But sometimes, I use the darkness to my advantage...or at the very least to have some creative fun.

Last night, after using up all the golden light left from the sunset in Malibu Creek State Park, I decided to experiment with some light painting.

Light painting in photography basically involves leaving the shutter open for a specified amount of time and using an external light source to "paint" a scene. It's basically the same technique used to photograph lighting during thunderstorms. In that case, the lightning essentially paints the scene.

Below is one of the photos from last night using this technique.


Here's how it's done...
Now this photo involves a lit bit of trial and error, but here's how we did it. First of all, I set my focus point to the location the model (Grace) was going to stand. I locked the focus there, and then I had a another location from where Grace would draw a "G" using the light from my cell phone.

Grace would utlize both locations to create the image. The difference between the locations is that
I used a slave to fire an AlienBee 800 at the second location once Grace was in place. I did not fire the AlienBee in the location where Grace drew the "G".

So to summarize, I used a 13 second exposure set at F-11. During those 13 seconds Grace drew a "G" in location one. Then I covered the lens with my hand while she moved to the second location, the location with the locked focus. Once she was in place, around the 8 second mark, I fired the AlienBee. I then covered the lens with my hand once again until the shutter closed at the 13 second mark.

Below is another image except Grace drew a heart in this one.


Again, once the sun goes down, it doesn't mean you can't shoot some creative portraits using advanced techniques. Just like everything else in phoography, it takes a lot of practice to get the technique down. -CG

Below are some more images from the session in the evening.